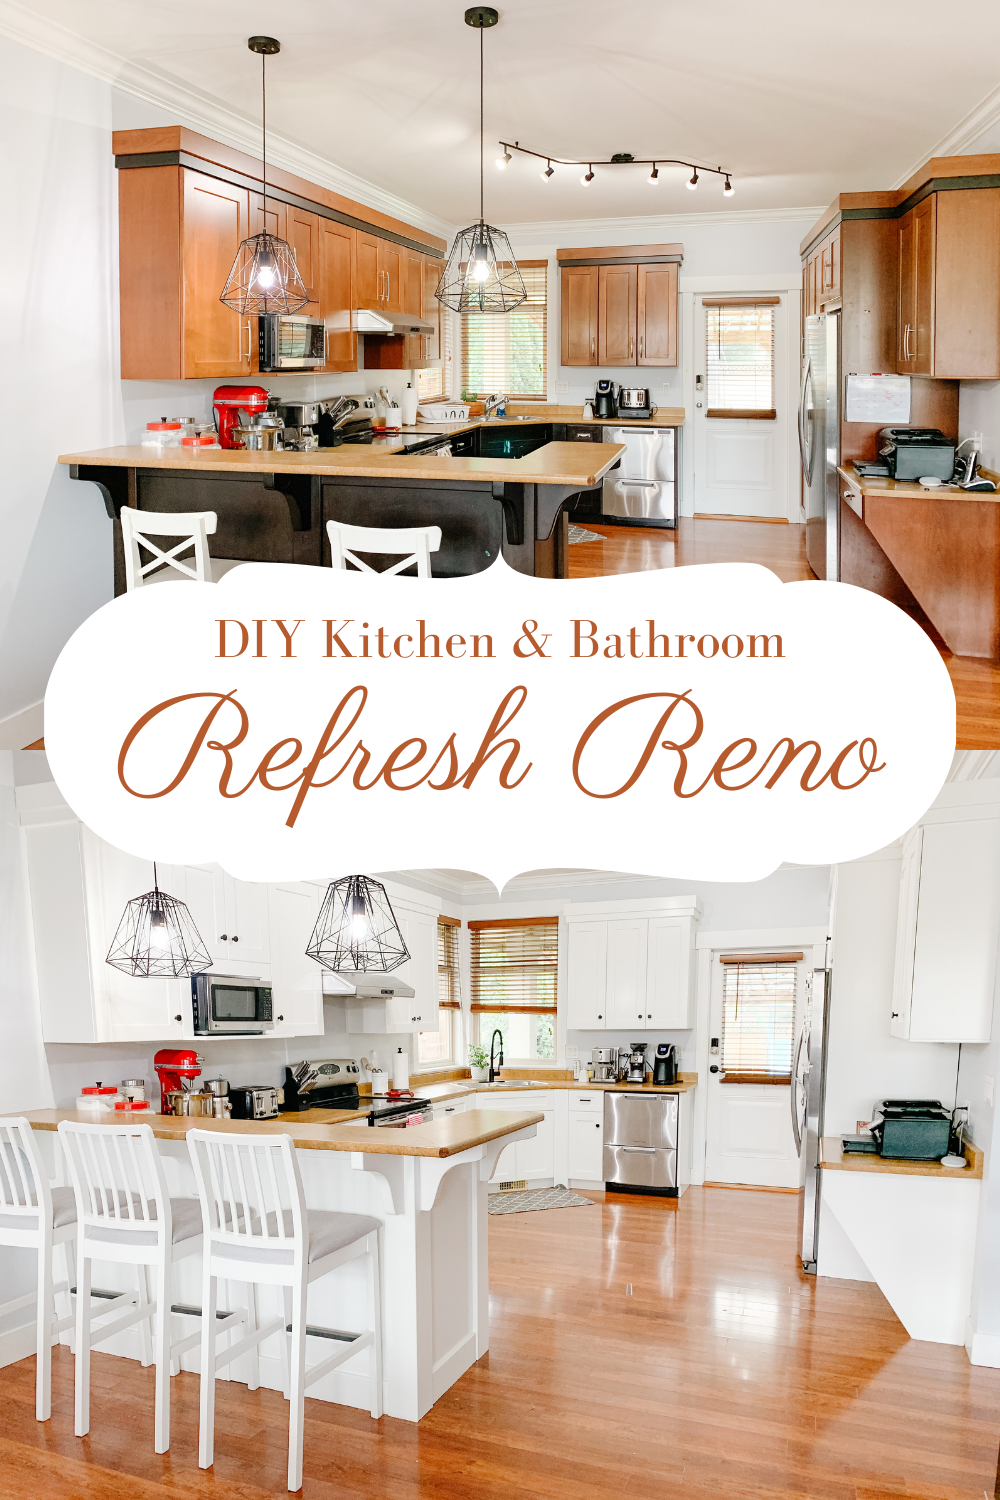
Hello friends! Wow it has been over a year since I have sat down and actually pumped out a blog post. As you know most of my posts are over on Instagram and I’ve just been SO busy with settling into our new home that I just haven’t found the time to blog! But this DIY kitchen and bathroom refresh Reno we did this past weekend definitely needed to be documented!
A Home with Good Bones
So to catch you up, in August 2020 we bought and moved into our FOREVER HOME here in Abbotsford! We are absolutely in love with neighbourhood and the change of pace. Our home was built in 2006 so its around 17 years old now. It was actually the very first home we went to check-out with our realtors and we fell in love with it immediately! But you know me, I can’t just jump into purchasing the first home we saw! So we went around and viewed other homes but this one became the standard that we measured all other homes against. So we after only one weekend of searching we put in an offer and got the house!
One of the reasons we fell in love with the house is because of its great bones. The colour schemes in homes back in 2006 was all about the beige, creams, browns and yellows. Well thankfully the walls in our home was updated and painted a light greyish blue and white trim, but the rest of the home was dark brown and just blah. However we saw the potential and figured we could just do a little DIY Kitchen and Bathroom refresh Reno so here I am sharing how our first attempt went!
What You’ll Need
Okay that’s enough blabbering, here’s all supplies you’ll need to paint your kitchen and bathroom cabinets and get started on this DIY Kitchen and Bathroom refresh Reno!
- Orbital Sander
- 180 & 220 grit sand paper
- Sanding Blocks 150 Grit
- Rollers
- Drop Sheets
- Green Painting Tape
- Paint Brushes
- Cabinet Paint
- Black kitchen Hardware
- Cabinet Paint
The Process
Sanding
This is the hardest and longest part of the process! First we started by removing all the cabinet doors and hardware. We then took all the doors and cabinets outside and began to sand using the Orbital Sander, starting with the 180 grit sandpaper. Once you’ve sanded all the doors with that, you move onto sanding with the 220 grit sand paper. This ensures that all of the top coat varnish that would be on the cabinet doors is removed and preps the surface for painting. On areas that we couldn’t remove and on those harder to reach corners we just used a 150 grit sanding block, and gave it a good scuffing by hand. Once all your doors are sanded, take some warm soapy water and wipe each door down, ensuring that your cabinet surface is clean and free of debris.
Tip: Label which door belongs to which cabinet with numbers or letters for easy reinstallation.
Prepping to Paint
The second tedious part of the process would be taping. We always buy our green painters tape and drop sheets from the dollar store, super inexpensive and pretty great quality if you ask me! So, taking the painters tape you want to tape of any area that you don’t want to get paint on. This would includes edgings, corners, the floor, parts of the counter. Afterwards we opened up our drop sheets and placed them on the floor so that we could minimize the amount of paint drippings on the floor and help with a faster clean up.
The Fun Part, Painting
Finally the fun part, PAINTING! Since we were changing our cabinets from dark brown to white, we needed 4 coats of paint to cover the old cabinet colour. We used rollers and paint brushes and did this all by hand. For paint we went to Cloverdale Paint and purchased the Renaissance Interior/Exterior paint in the Semi-gloss finish. We were recommended this paint by the Cloverdale associate because she said it would be the most durable if we needed to wipe anything off of the cabinets as time goes on.
The process, from sanding to painting took us 5 days to complete! We literally would wake up in the morning, eat breakfast and paint all day, until 12AM. Now, obviously you can take your time with this, but Paul only had 1 week off so we wanted to try and get it all done within that week. If you follow me on instagram, you saw that we turned our living room into a painting area and spread out all of the cabinet doors on the floor and painted them that way. We painted one coat and waited 2 hours in between painting the next. We did this process on both sides of the cabinet doors.
Reinstalling the Cabinet Doors and Installing the Hardware
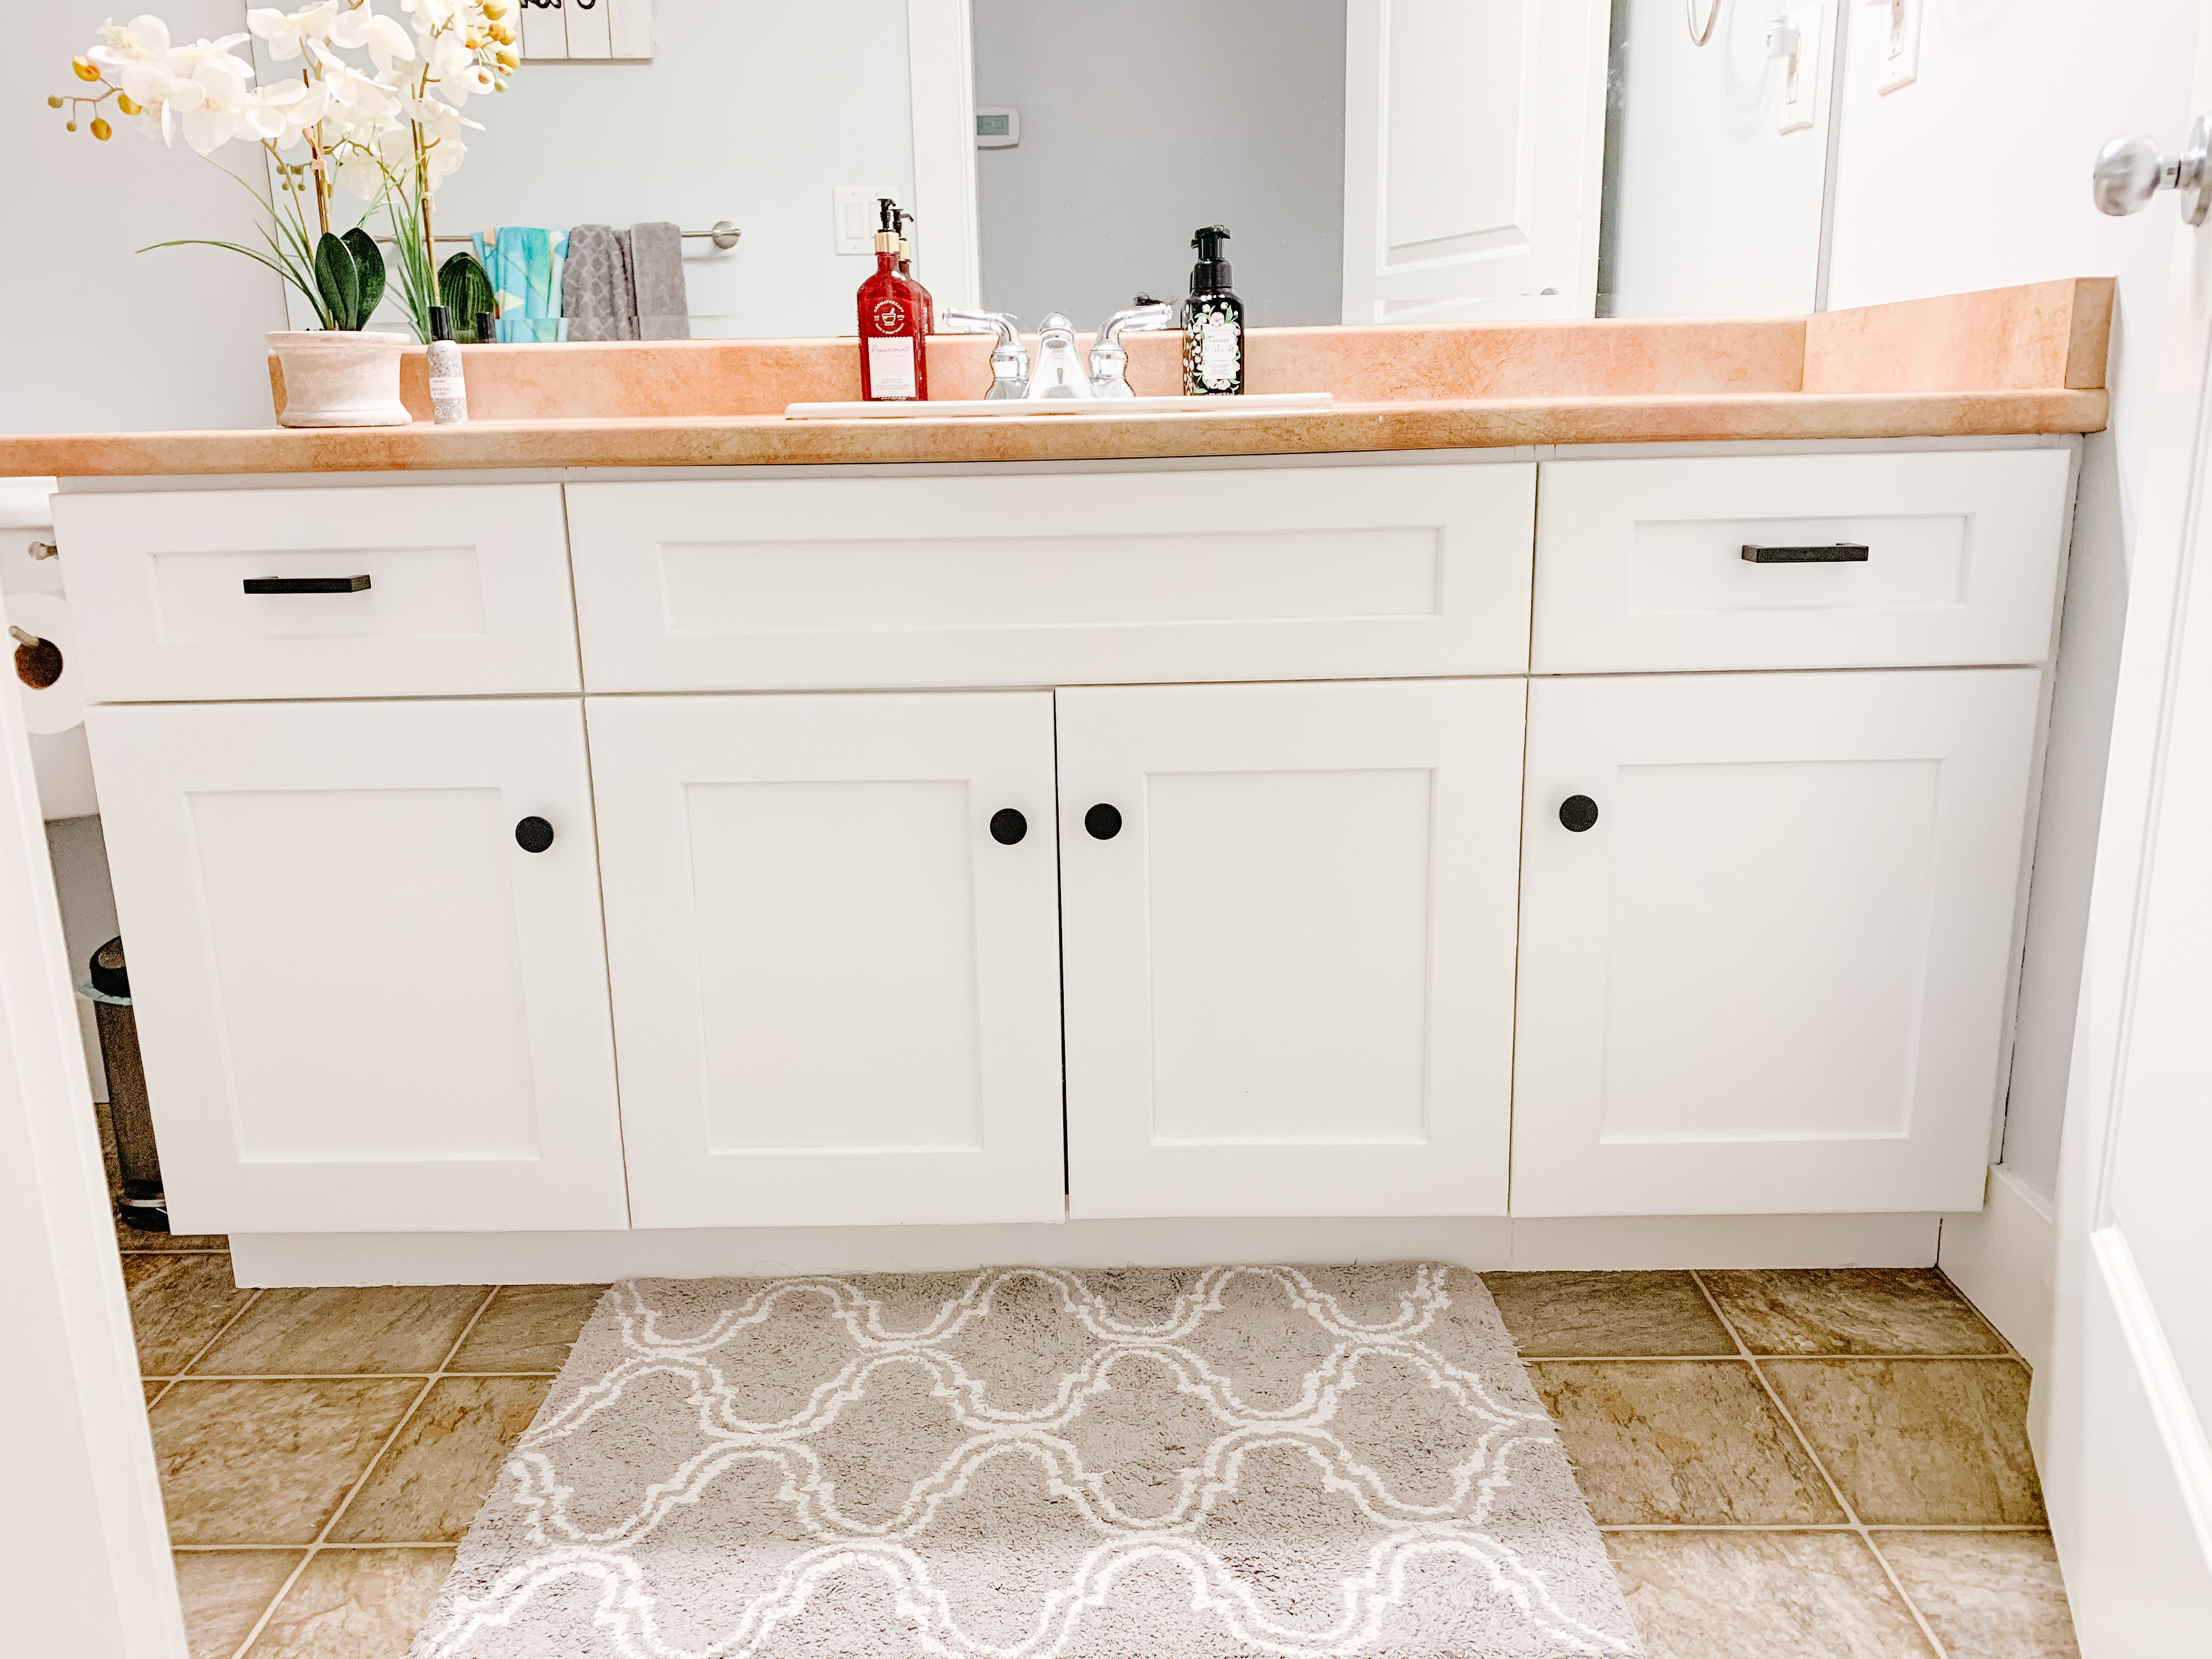
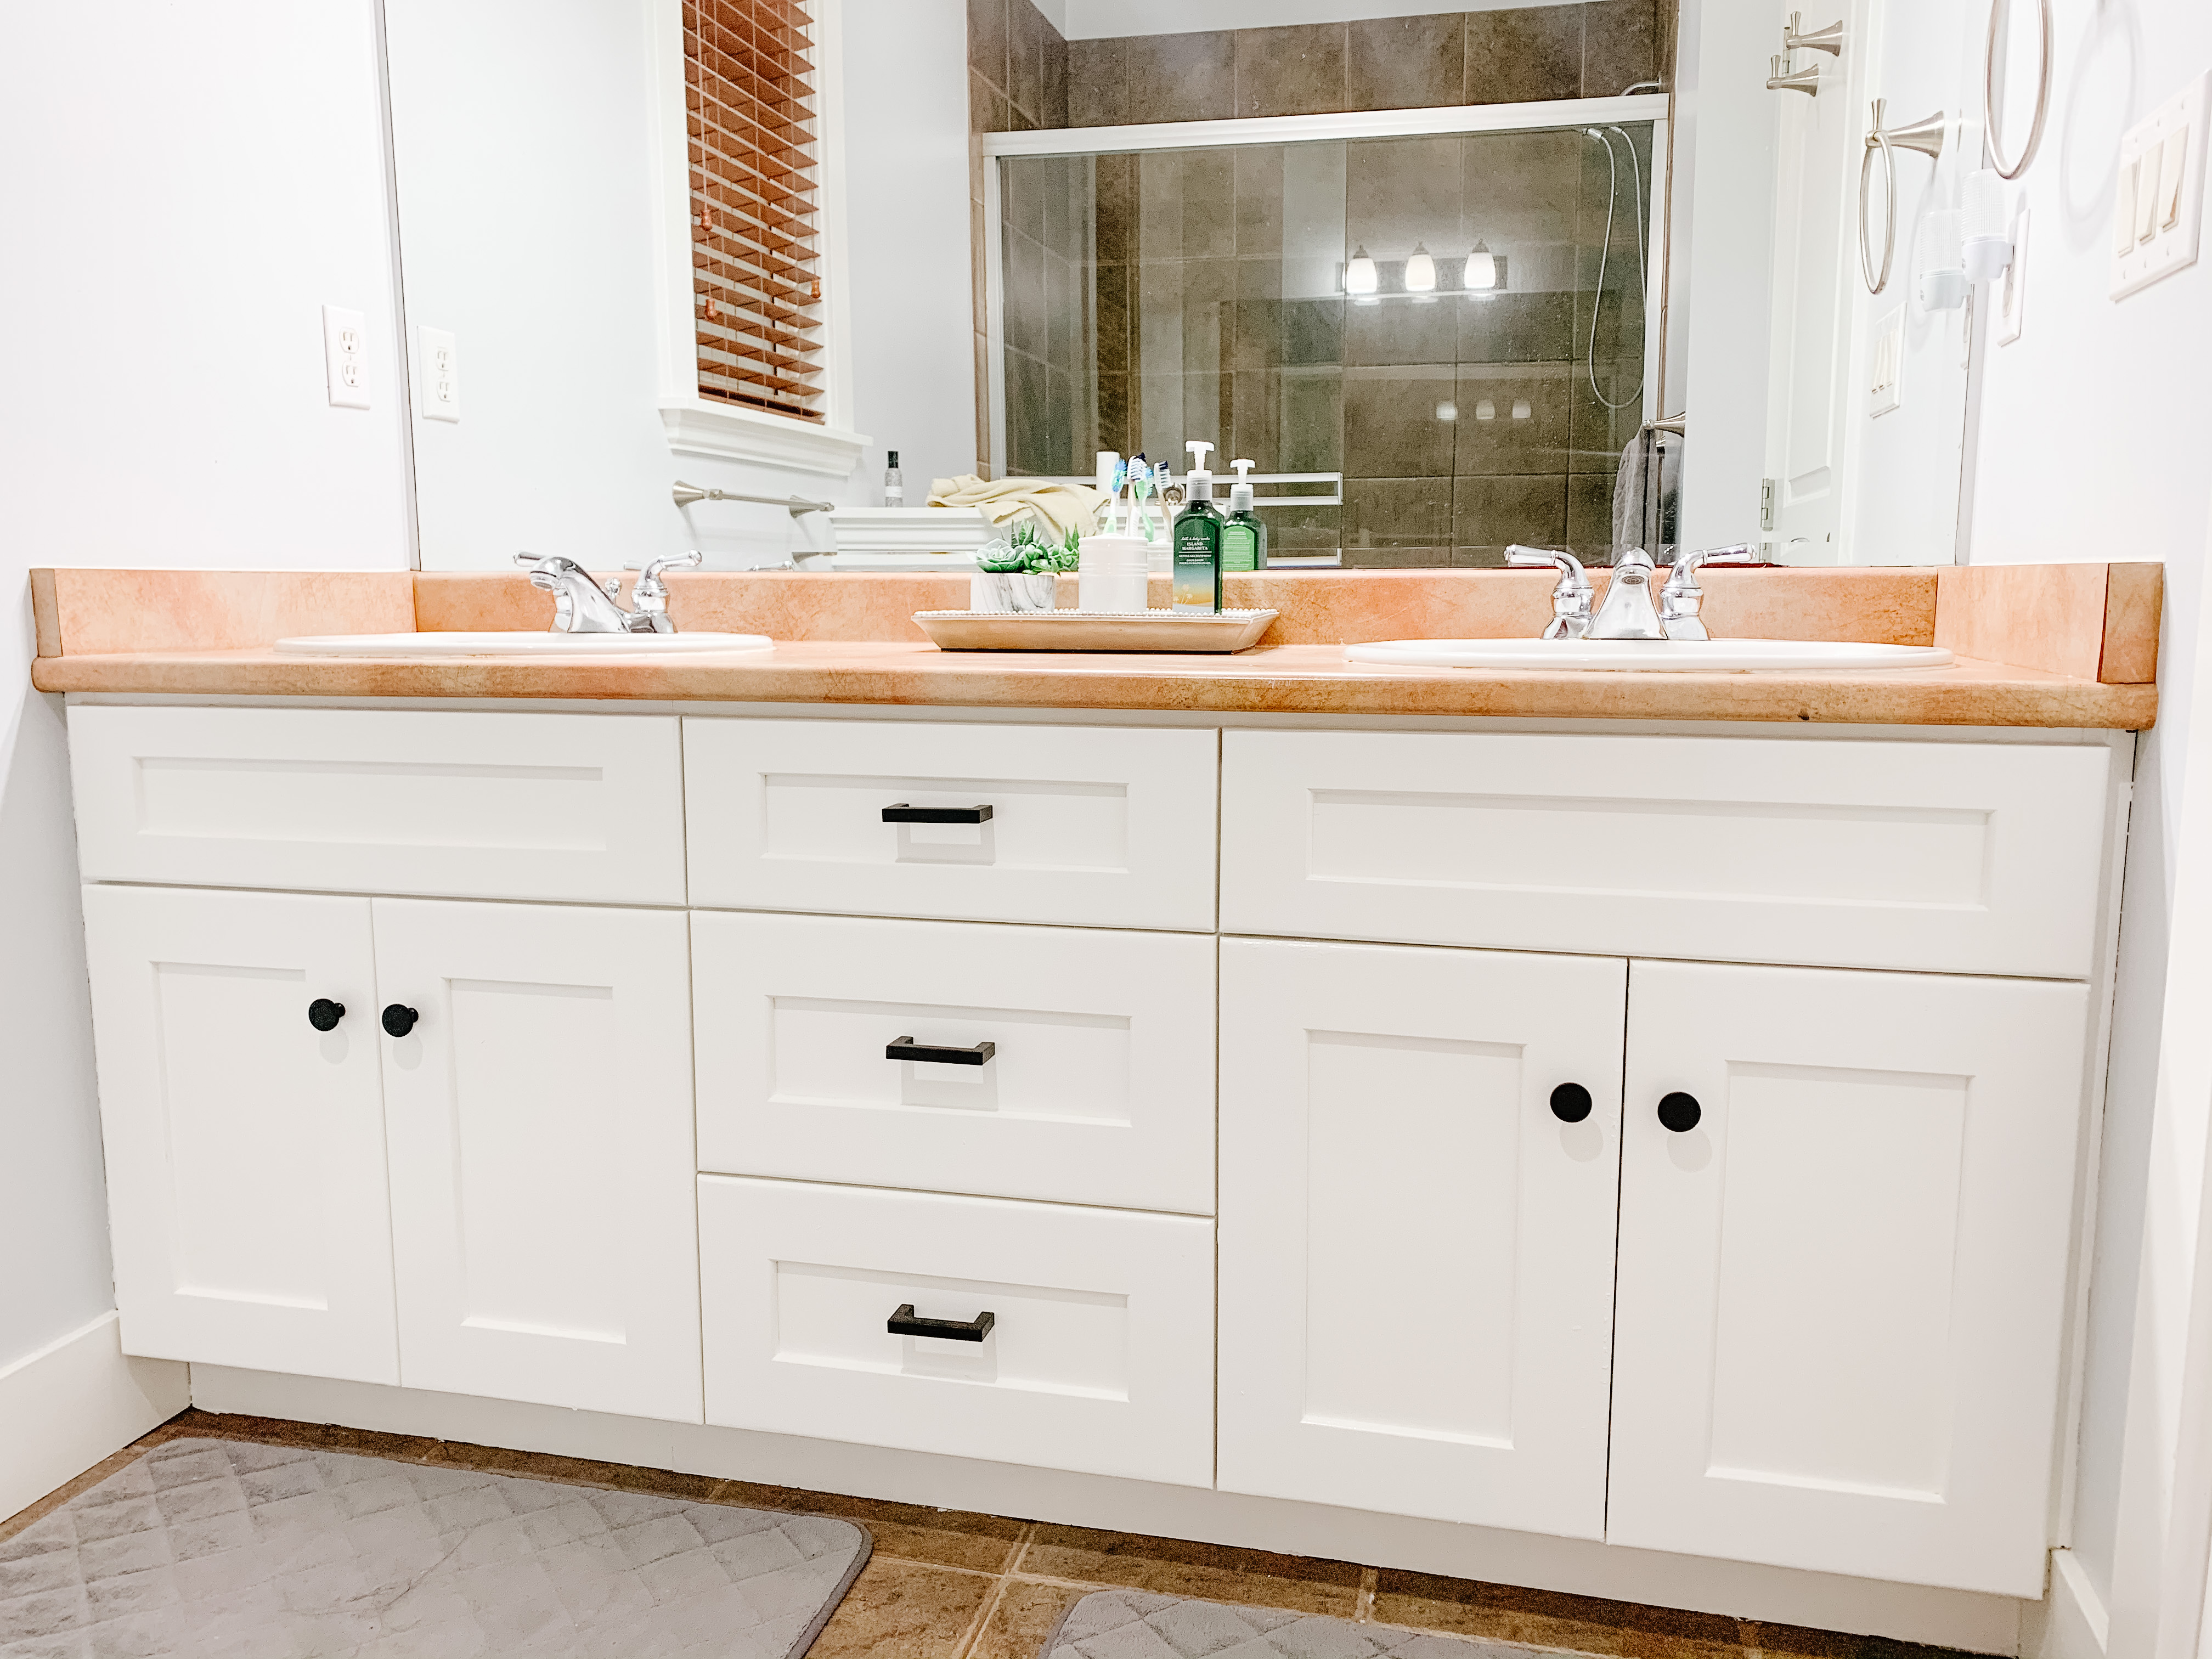
Once we had let the last coat of paint dry overnight we reinstalled all the doors and began to install our new hardware. I wanted all the cabinet doors to have circle knobs and the drawers to have square pulls. We decided the best look would be ones with matte black finishes and we decided to order these from amazon. These are the knobs and these are the square pulls we ordered and I love how they complete the look!
The Before and After Shots
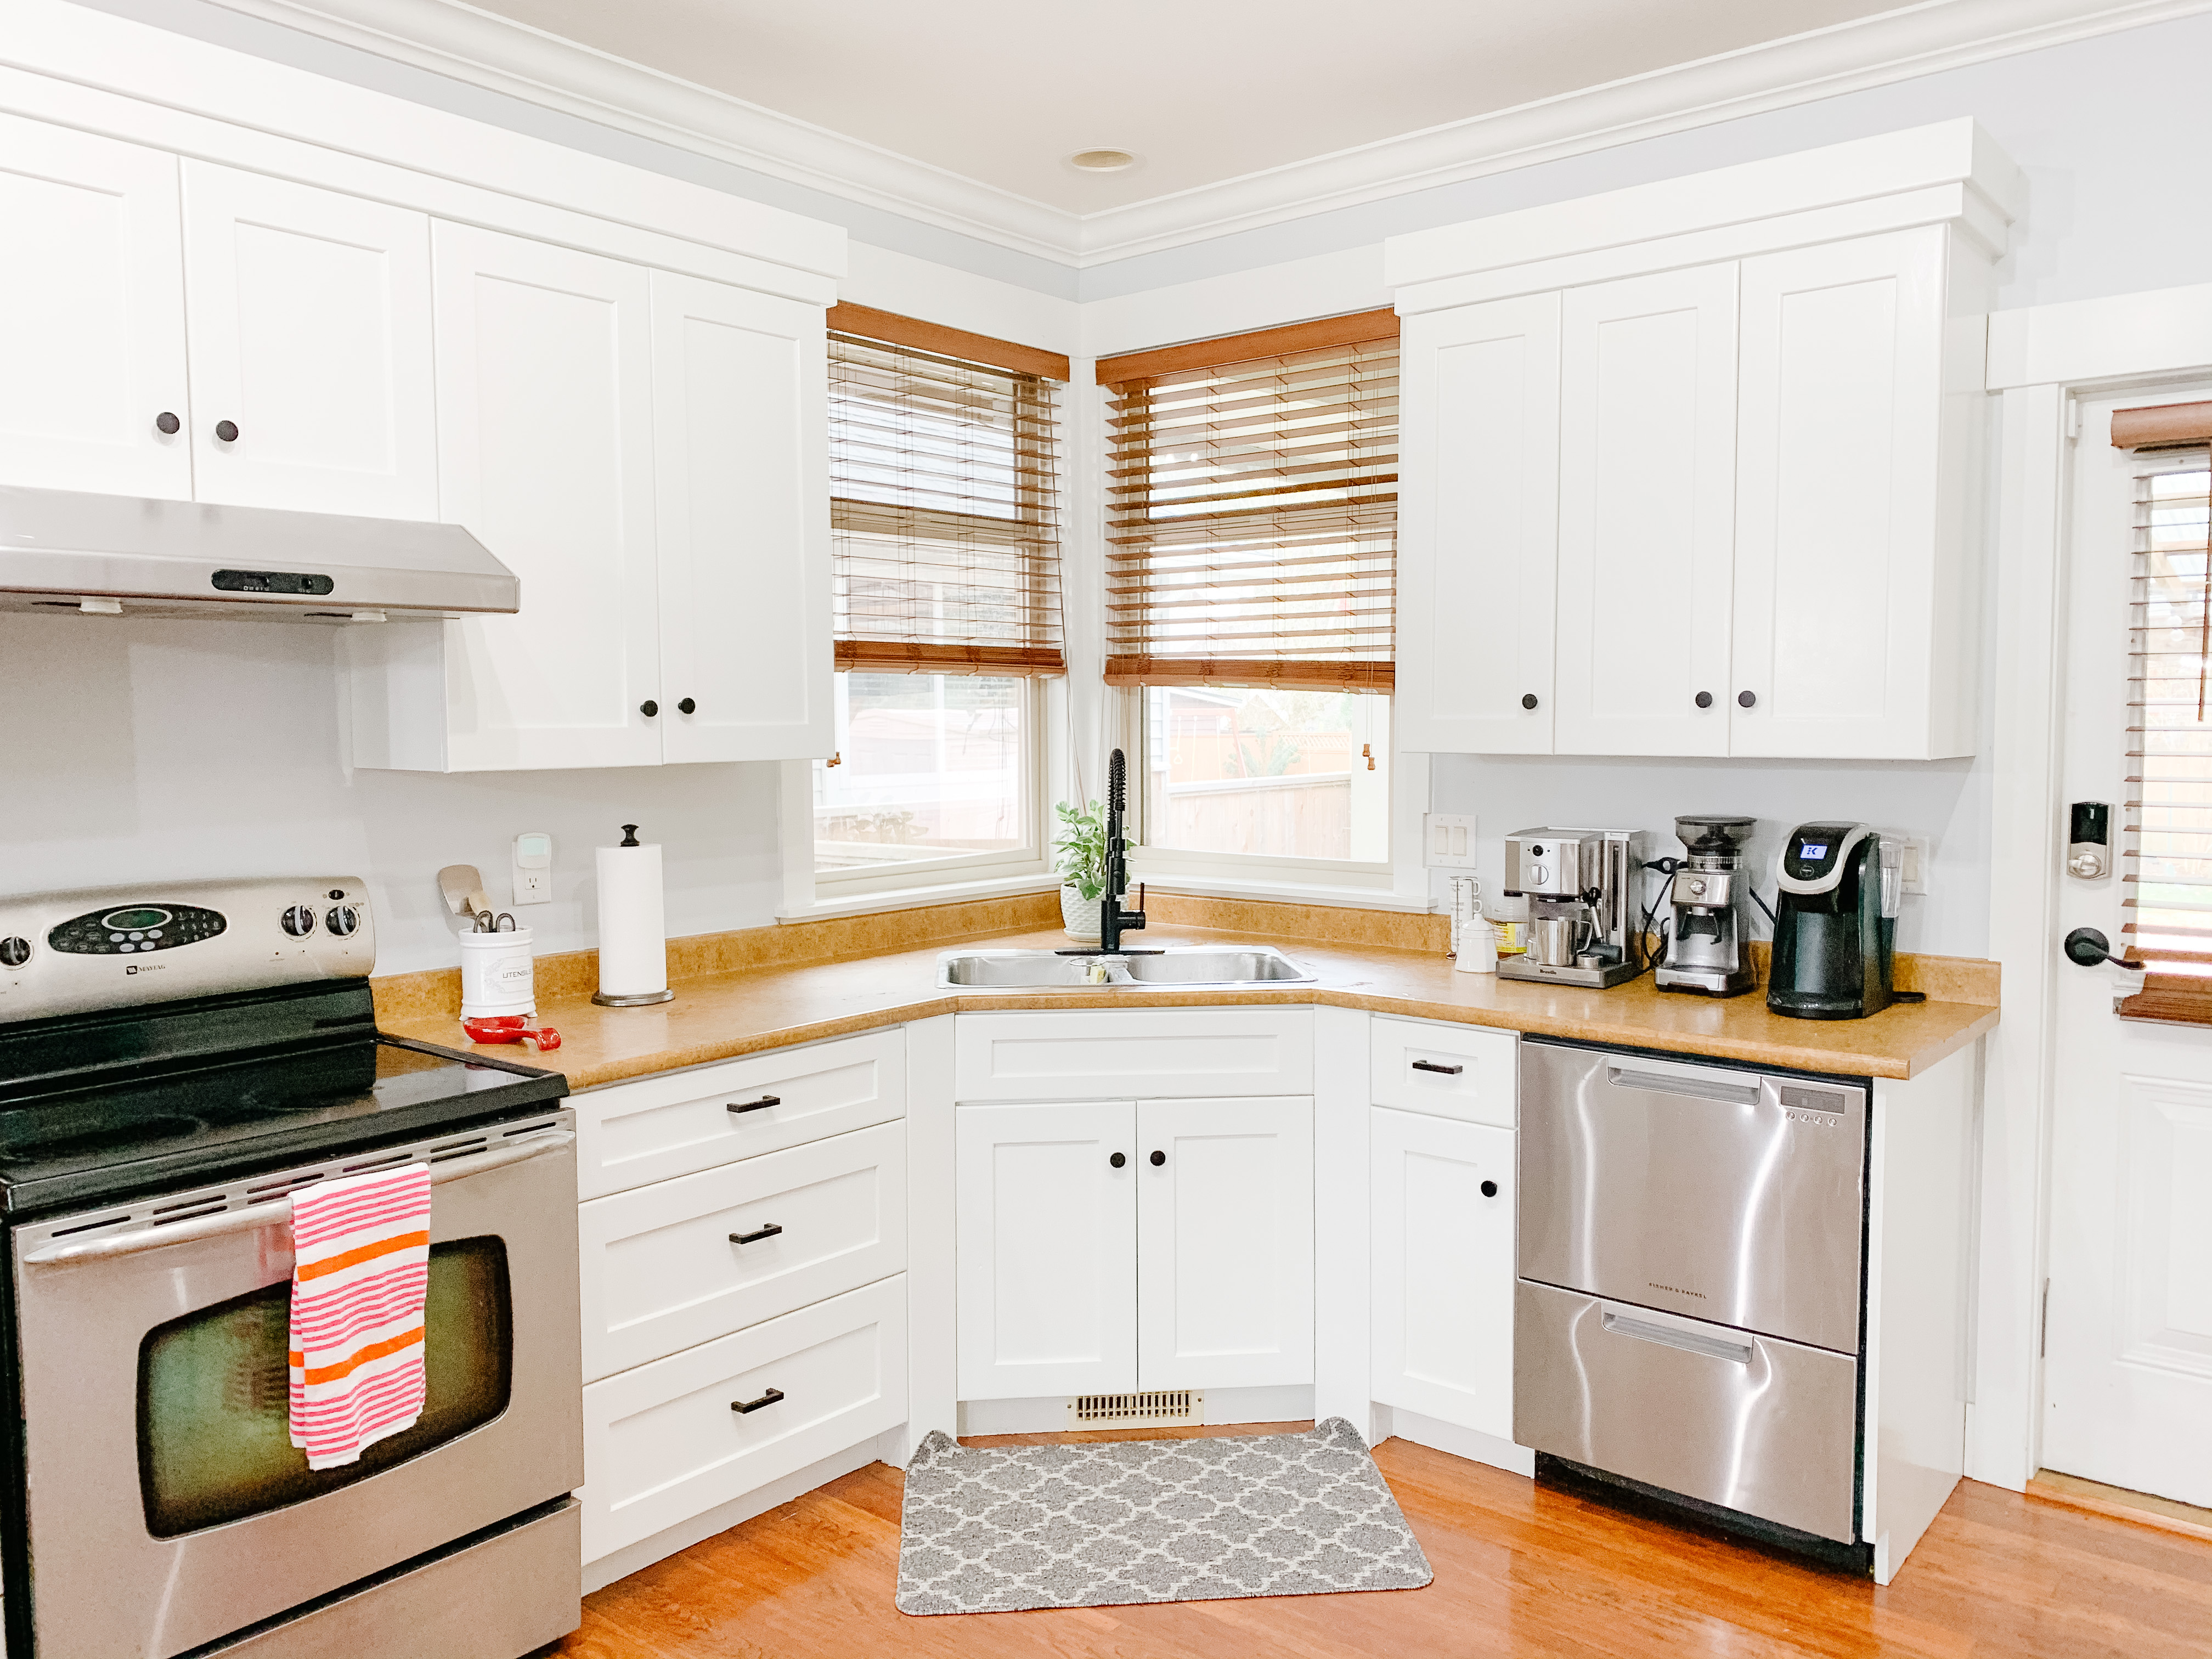
Before
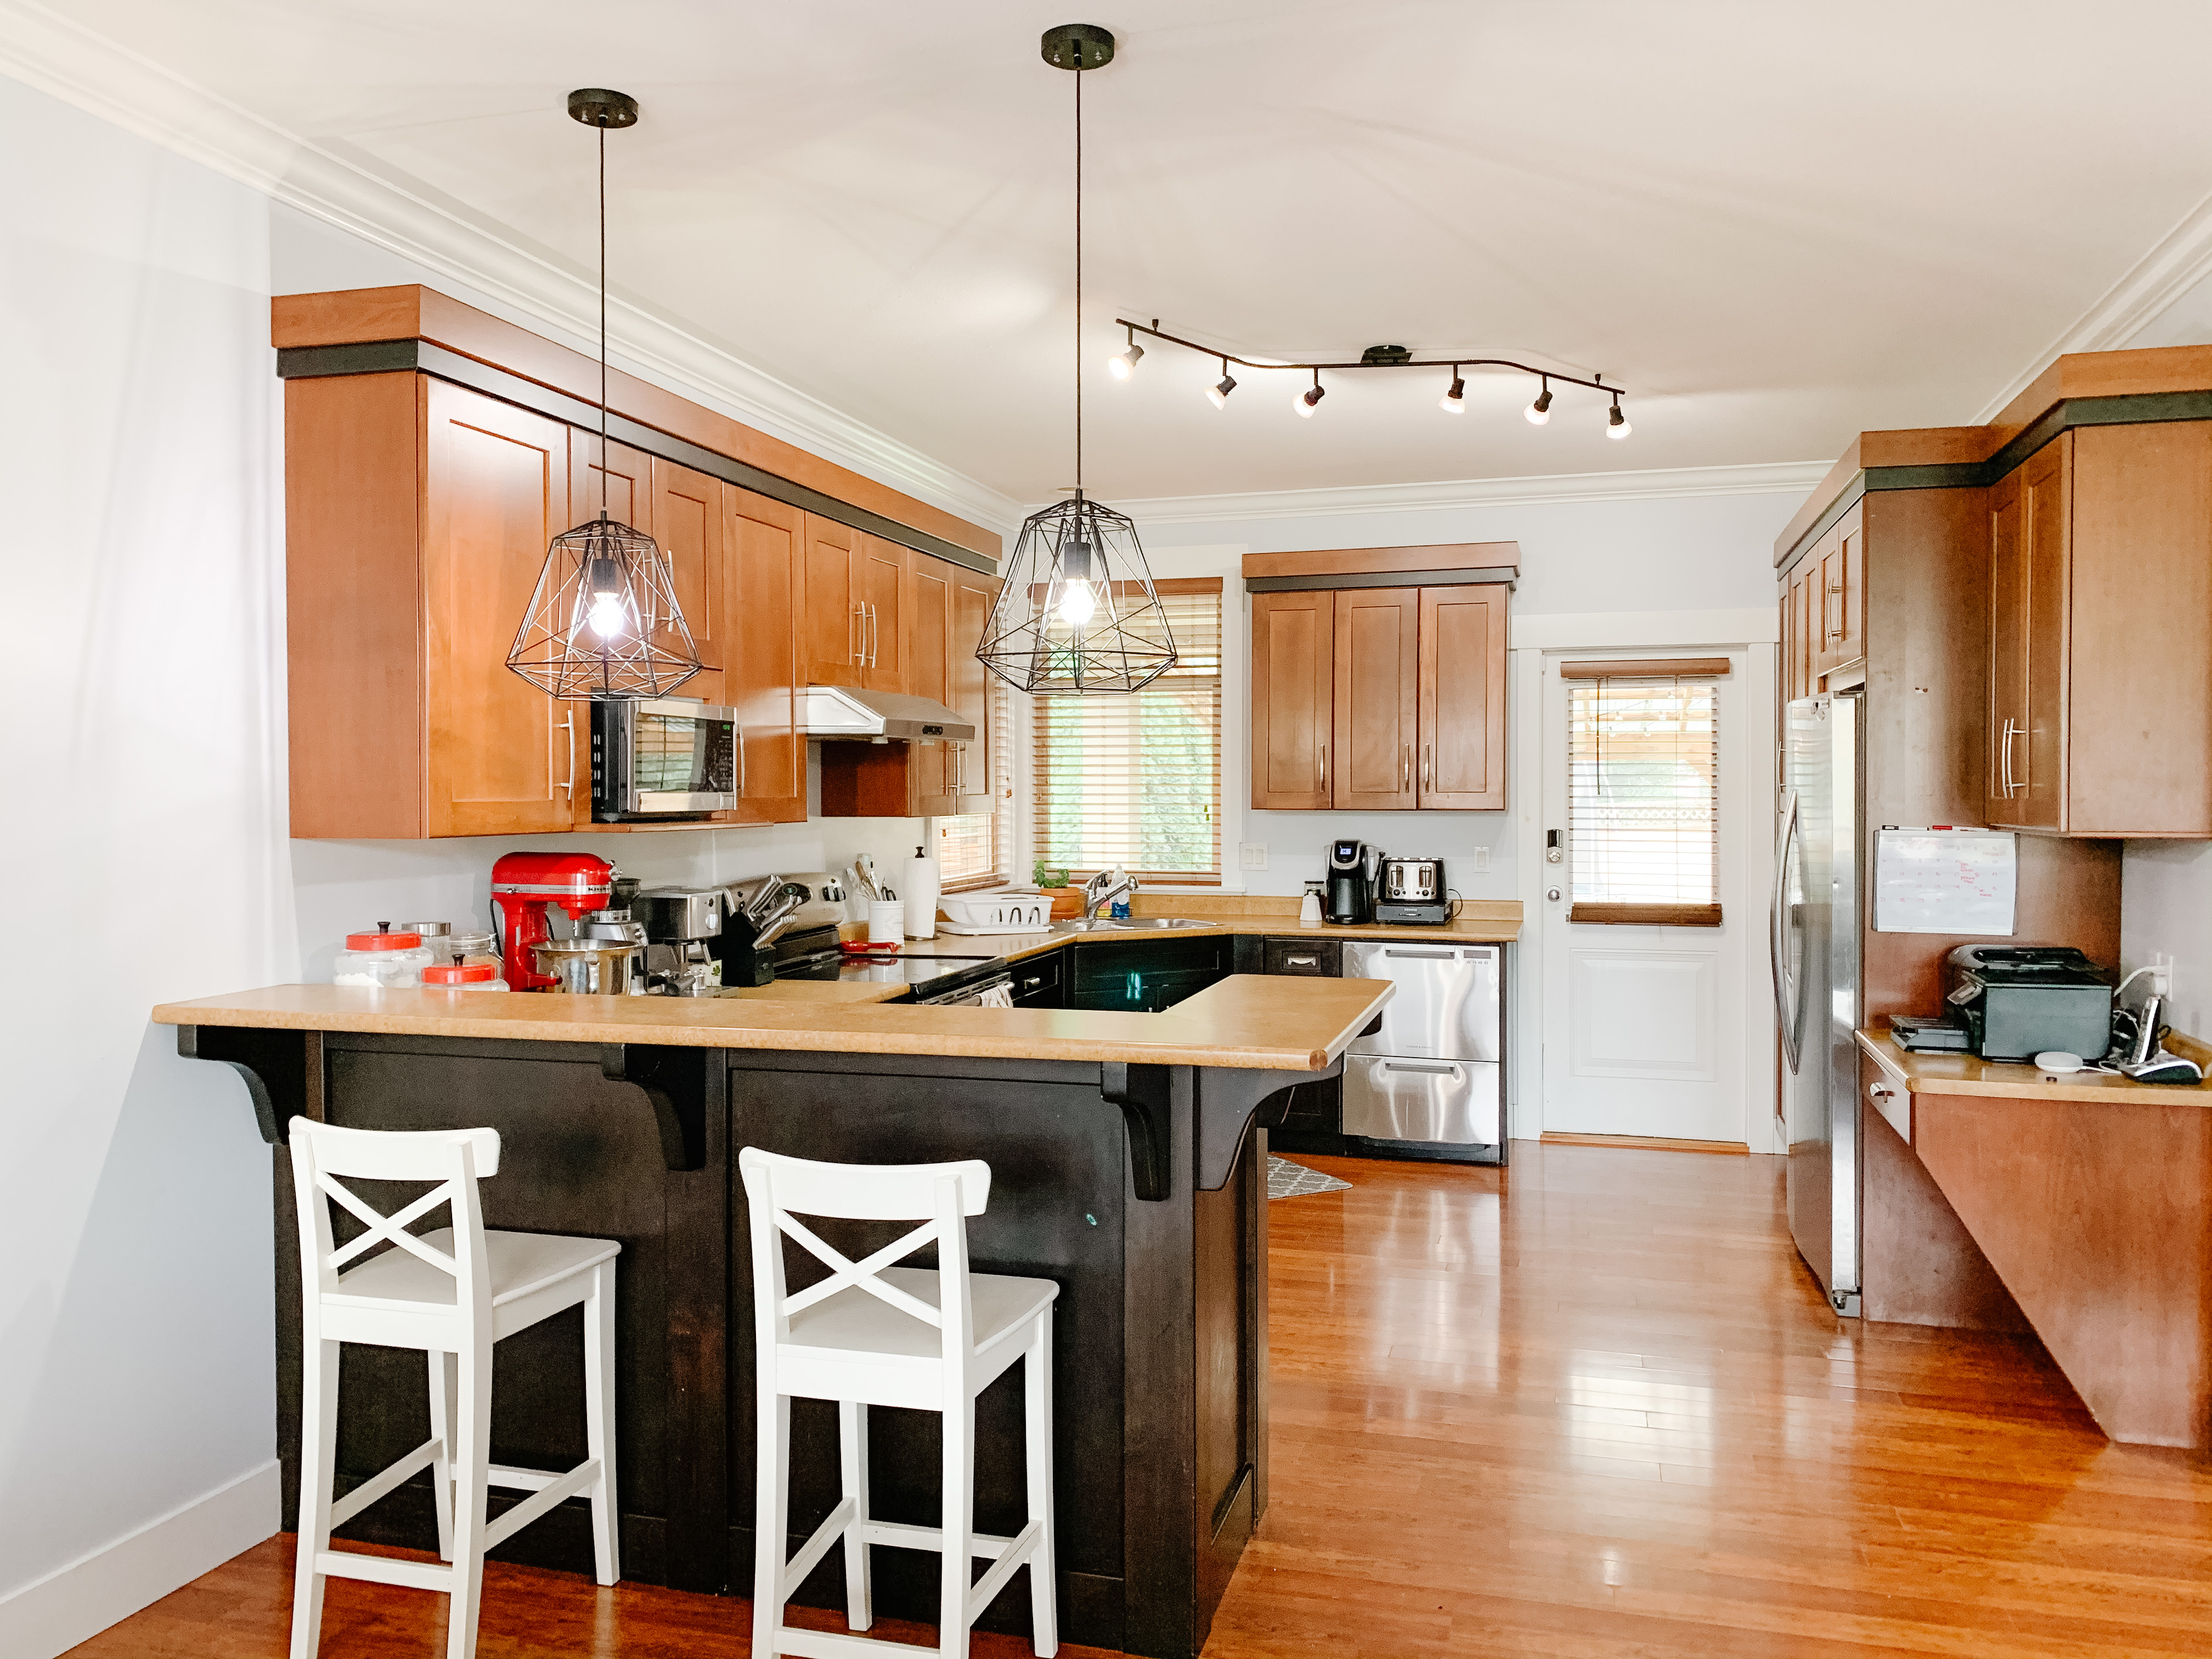
This is what Our kitchen use to look like! Super dark, brown and it never felt like there was enough light in this kitchen. As for the bathrooms, I forgot to take a before picture!
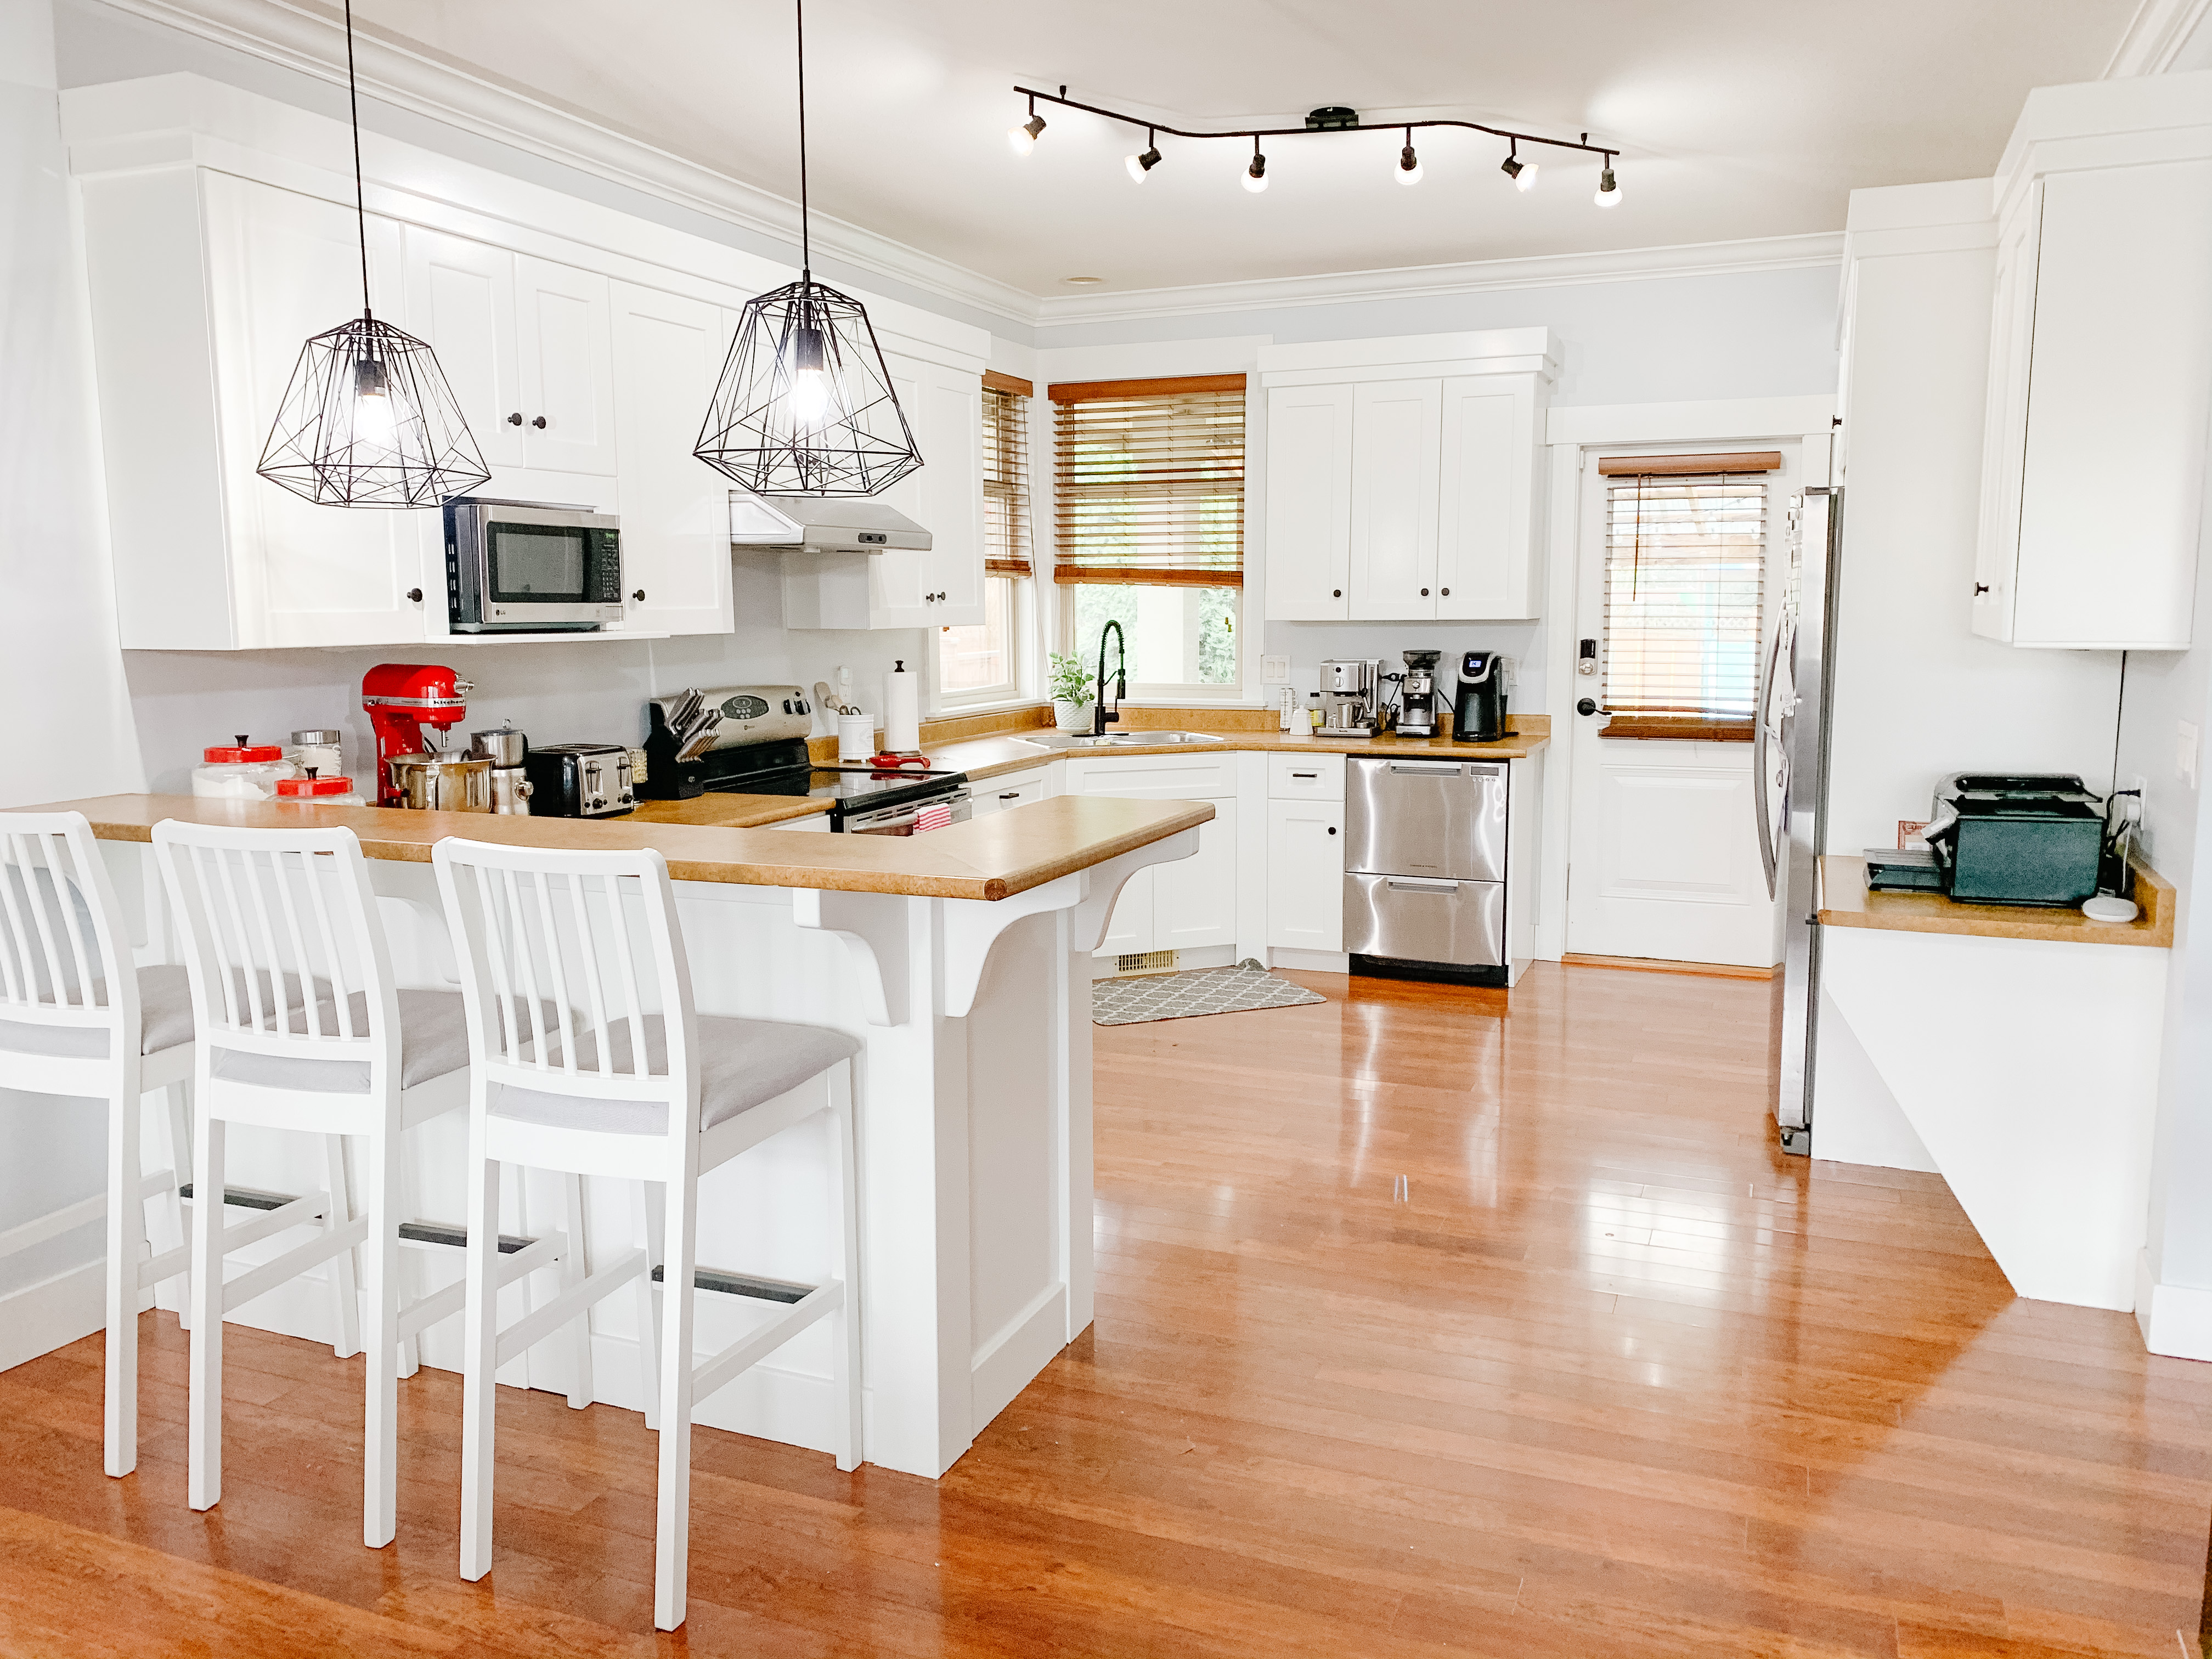
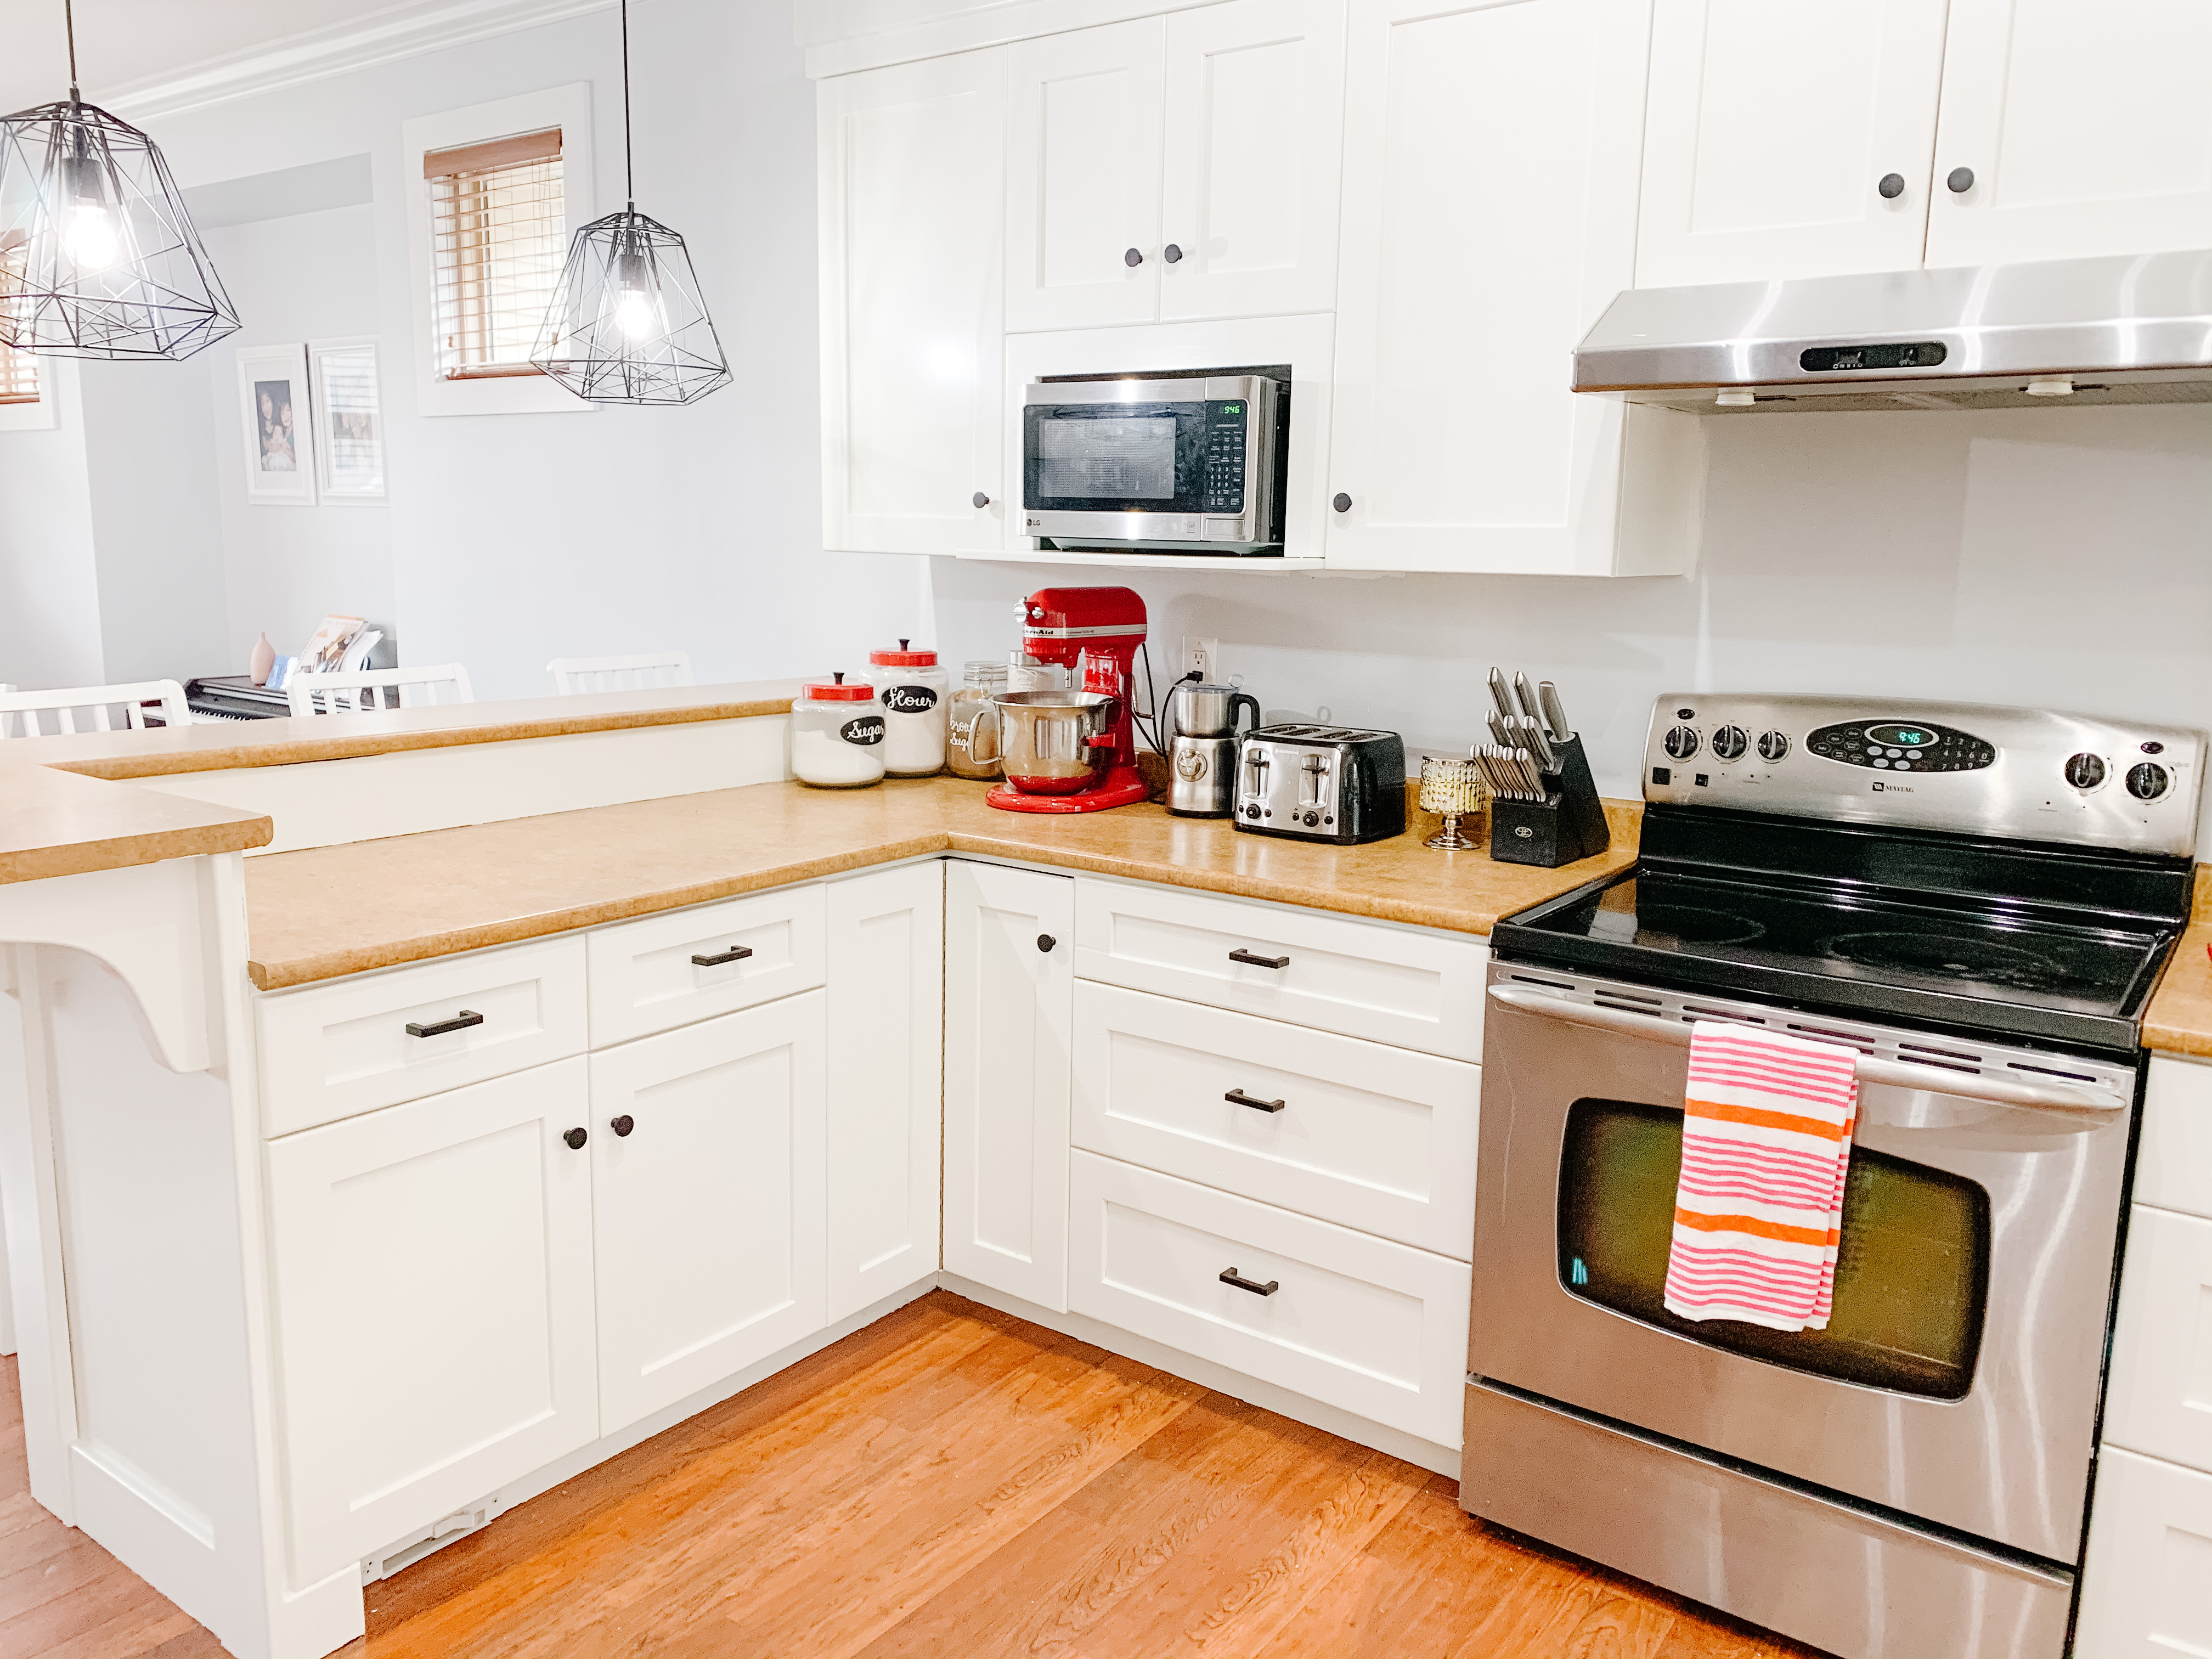
After
Look at how much of a difference a coat (or 4 coats) of paint can make in a space! The white totally brightens up the kitchen and gives it a more updated and modern farmhouse vibe, which is exactly what I am going for. The matte black hardware really compliments the light fixtures and I love that we decided to go with knobs and pulls instead of just one over the other.

Bathroom Vanities
So I forgot to take a before shot of our bath room vanities, but essentially they were the same dark brown as our kitchen! Here are the AFTER shots below!
What’s Next?
There you have a peak into the process of how we did our little DIY Kitchen and Bathroom refresh Reno! So what’s next? We would love to change out the blinds from brown to white, installing roller shades or roman shades on the 2 kitchen windows and updating all the counters. I’m having trouble deciding between black counter tops or white countertops, granite or quartz?! Let me know your votes for which colour countertops and material we should use in the comments below. 🙂
Check out more Home inspired posts here.
With this blog I strive to cultivate and foster a community that encourages and empowers women from all walks of life. I was a stay at home for 11 years to my three beautiful daughters and have since entered back into the working world! I am married to my high school sweetheart and together we have built a life we love. You can usually find me with a book in one hand and a Starbucks coffee in the other. I hope that this blog brings you comfort in knowing that you aren’t alone in whatever it is you’re growing through as a mother, a wife, a woman.
